Thursday, April 2, 2009

DAY TWO of BLOG HOP!

Hello! Have you been HOPPING? If you missed yesterday, you will want to go back and see these beautiful projects the Design Team has created.
and head to Suzy Lorie Faith and scroll down here for another Sneak Peak from me...
Sweet 'n Sassy Stamps is doing things a bit different this BLOG HOP and RELEASE PARTY. We are posting the challenges throughout our BLOG HOP and you will have a chance to win these 4 new fabulous stamp sets! This time around, the Design Team is posting the challneges on their blogs - so check out each blog to find out the challenges! This card was a take on the Sketch Challenge! Come on and play- we WANT to see what you create! (Scroll down to see the Challenge I posted!)
This stamp set is called Spring Scenes - I just love the versatility of this set! You will definitely have to go through the HOP to see all of the different ways the Design Team uses this set!
Here are the details:
Stamp Sets: Spring Scenes and I'd Pick You Mouse and words)
Cardstock: Basic Black, Coordinations, Whisper White
Accessories: Scallop Eyelet punch, Dew Drops, Mini Glue Dots, Rounded Tab Punch
Be sure to hop on over to be FULLY WOWED by the Design Team
and head to
I have had a few friends who are struggling this week. I struggle at times myself and read this devotional from Proverbs 31 Ministries and it encouraged my heart, so I thought I would share it with you today...
"For God did not give us a spirit of timidity, but a spirit of power, of love and self-discipline." 2 Timothy 1:8 (NIV)
Have you ever noticed how some TV commercials mix just enough truth with their product to make it believable? While that's called false advertisement, the product still comes off convincing. It's not until we purchase the product, and it fails, that the trickery becomes exposed.
In the same way, Satan specializes in false advertisement. He's good at making our fears look real when they are not. Does that mean all fears are wrong? No. The fear of standing near a high cliff protects us from getting to close to the edge and toppling over. One the other hand, Satan's spooks are full of trickery. They are usually disabling and keep us from progress. This kind of false advertisement can choke our faith and fuel our fears.
Have you ever wondered where our struggle between faith and fear began? I have. According to author and teacher Malcolm Smith, fear was introduced to the human race by a satanic lie.
The Garden is the first place where the serpent deceived Eve by twisting God's word. The Lord told Adam not to eat of any tree in the garden except the tree of knowledge of good and evil (Genesis 2:16-17). If he or Eve ate from that tree, they would surely die spiritually. Not only did Eve eat the forbidden fruit, but she offered it to Adam and he ate too.
As soon as Adam disobeyed God, their relationship changed. Adam was not only afraid, but he doubted God's authority, friendship, and provision. Satan's lie told Adam that he didn't need God. In fact, Adam was persuaded that he could be his own god, self-sufficient in every way.The same can be true for you and me. At times, you an d I live independent of God's presence. We act as if everything depends on us. We wouldn't dare admit that we are in over our heads. We want to appear in control. But God never meant for you and me to be strong in and of ourselves. We were meant to show His strength in our weakness as He provides for our needs. We were created to live like little children, dependent on the care our heavenly Father.
The times we insist on living life our way, in our own strength, we experience the same result as Adam and Eve. We will live in fear. This is right where Satan wants us.
If we're afraid to try, we never will. If the enemy can keep us contained by fear, we won't be able to fulfill our potential or make a difference in the life of another. Satan knows what we are capable of with Christ. To prevent us from that realization, he poisons us with fear.
The truth is what we fear rarely comes to pass. This kind of fear that is fueled by Satan's lies can be described by this acrostic:
False
Evidence
Appearing
Real
It's not that we shouldn't be concerned about certain issues of life such as safety and health. But when worrying takes over by keeping us up at night and shutting us down during the day, we've moved into a place we were never meant to live. We must return to living in God's presence and relying on His promises and provision. Only then will we be able to distinguish between truth and lies. Only then will our lives be marked by faith, not fear.
Dear Lord, help me to discern between false fears and real concerns. As I commit Your Word to memory, make Your truth alive in my heart so that I can battle fear and live by faith. In Jesus' Name, Amen.

Related Resources:
An Untroubled Heart by Micca Campbell
Application Steps:
Determine if your fears are real or if they are only False Evidence Appearing Real. If your fears are real, heed their warning. If they are smoke and mirrors performed by the enemy, take those thoughts captive and give them to God in prayer.
Reflections:
Do you doubt God's provision and protection - why or why not?
Are you living independent of God's presence, or carefree in His care?
How can depending on God's resources and strength eliminate your fears?
Power Verses:
Romans 8:31, "If God is for us, who can be against us?" (NIV)
John 14:27, "Peace I leave with you; my peace I give you. I do not give to you as the world gives. Let not your heart be troubled and do not be afraid." (NIV)
1 Peter 5:7 "Cast all your anxiety on Him because He cares for you." (NIV)
© 2009 by Micca Campbell. All rights reserved.
If you have not heard of the Proverbs 31 Woman Ministries, I really enjoy their devotions.
Have a blessed day!
Chrissy D

Wednesday, April 1, 2009

BLOG HOP & BELLI CHALLENGE #61 & COPIC COLOUR CHALLENGE

This post is going to be a TRIPLE DECKER with TWO sneak peaks for you in the Sweet 'n Sassy Stamps Blog Hop! If you have come here first - when you are done looking, you will want to HOP on over to the Sweet 'n Sassy Stamps Blog.
I had recieved a card a few weeks ago from a friend and that served as my inspiration for this card. I will share it next week! :)
This Blog Hop Sweet 'n Sassy is doing things a bit differently for this release. To celebrate the release of four new stamp sets, Sweet 'n Sassy will be having four challenges, each with a prize of the new set being featured. You will see each of the four challenges posted on DT member blogs during your blog hop from April 1-3. I am hosting the sketch challenge, and you guessed it, the winner will receive this super sweet Be Blessed set used to make today's card. This is a stamp set with a cause - more on that below.

Be sure to HOP to all of the Blogs to see the challenges - These are VERY easy to do!
I am hosting a challenge with the theme of BIRDS. To enter just make a card using BIRDS on your card, and upload it to the Sweet n' Sassy Gallery. There is no need for a keyword.

Here are the details of my project...

Stamp Sets: Dream Silouettes
Cardstock: Garden Green, Certainly Celery, Whisper White
Accessories: Dew Drops, Mini Glue Dots, Celery Grosgrain
Be sure to HOP on over to see the rest of the Design Teams Inspiring Sneak Peaks!
Start on the Sweet 'n Sassy Stamps blog and head to
It is good to be home and NOT busy. I am having a GREAT week. I have had lots of time to work on my blog and spend extra time snuggling and reading to my gremlins. To actually live here, I could complain, but I know that it would not change my circumstances.


I can always tell when Tax Time is here in my home because that seems to be when things fall apart. While I was away from home this weekend, we had a snow storm and our power went out several times. This brought on power surges - which blew out several of our small appliance things - The things I came home too being broken...

1. 2 Dvd Players (this is bad because we do Video School for the kids with Bob Jones Univ.)

2. One of our Computers

3. Wireless Internet Router

4. Nintendo Wii Player (sad!)

5. one of Television - the one Grace does her school on


Now, as I look at that list - I think WOW those are expensive items to have to replace, but I have to say on the other hand, we are blessed to even have those items. Ultimately they do not belong to us anyways, as all of our possessions were gifts from God. I am not going to stress about all of these things, I am going to trust God that He will provide for us when He deems it time. My flesh wants to run out and go shopping though! LOL


I combined this week's Challenges for the Belli Challenge AND the Copic Colour Challenge


I will start out with the Belli Challenge! In combination of these challenges, I am showcasing a NEW SWEET 'n SASSY STAMPS - BIRTHDAY GREETINGS.


The Belli Challenge for this week is to make an APRIL FOOL'S DAY card. I have to say I absolutely LOVE this card and the way it turned out. It makes me SMILE! Be sure to check out the Belli Design Team's FABULOUSLY FUN projects.

The Copic Colour Challenge colors are R22, E47 and B12 - be sure to check out everyone's GORGEOUS projects.
Each one of these Design Teams do such FABULOUS work! I feel privileged to be part of these teams!


Here are the details of this project...

Stamp Sets: Birthday Greetings by Sweet 'n Sassy Stamps, other images are Whipper Snapper Design

Cardstock: Neenah #80 Solar White, Chocolate Chip, Soft Sky, Pink Coordinations

Copics & Memento Ink

Accessories: Dew Drops, Mini Glue Dots, Dimensionals, Paper Snips, Chocolate Grosgrain.


Thank you for stopping by! I will have another Sneak Peak for the New Releases from Sweet 'n Sassy Stamps coming out tomorrow! I hope you have a blessed day!


Chrissy D

Tuesday, March 31, 2009

TUESDAY TUTORIAL - BLENDING COLORS WITH COPICS

BLENDING COPIC COLORS TUTORIAL

Blending colors is a wonderful way to get the shades you want, if you do not have all of the colors. When I first started with Copics, I started with a few basic colors. First of all because I could not afford them all at once, second of all, I was not completely sold on them! Once I played with them and discovered the awesome blending possibilities, I was quickly sold on these fabulous markers!
Ok, for those of you who know about the basics of coloring, please bear with me as I just go all the way to the beginning of Color! J I am going to assume you know nothing, although I am quite confident you DO know these things.

What you will need
A few basic colors of Copics
Palette for blending colors – you could use a plastic plate or the clear storage container you have for your Copics.

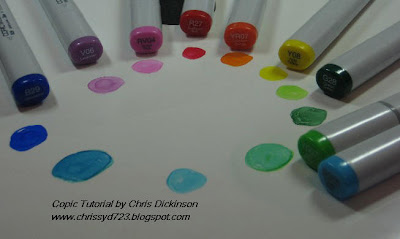
First, we will build a basic Color Pallette, creating our own Color Wheel….

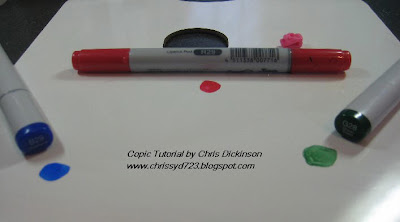
Your three PRIMARY colors will be the root of all of your colors…In elementary school, you may have learned that the primary colors are red, yellow, and blue. However, most of us now use color displays, for which the primary colors will be red, green, and blue.


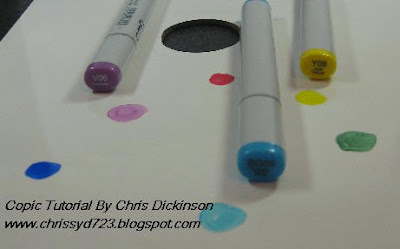
These are the Secondary Colors – you have Yellow, Purple and turquoise…

You can blend any of those Primary and Secondary Colors to get varying TERTIARY colors. Going one step further, you can add to the GRAY SCALE of the Copic line to get the depth of color you are looking for. (Remember the second number in the Copic Code tells you the amount of GRAY PIGMENT in your marker.) This will help you if you do not have the colors you are looking for in your personal marker selection to get the exact shades you want in your coloring.
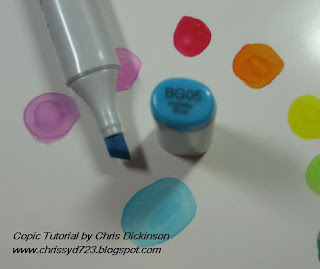
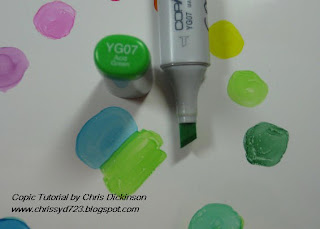
For example:

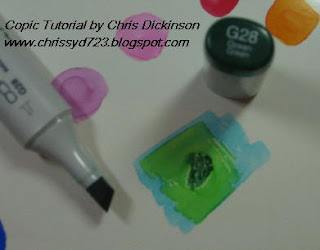
We will take the BG05 marker and color your palette. Once you get really comfortable mixing your own colors, you can even eliminate this step and color directly on your cardstock.


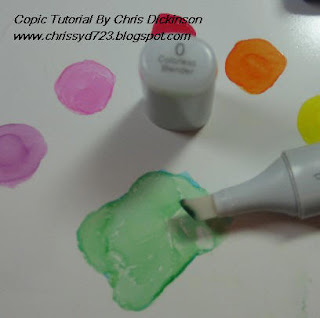
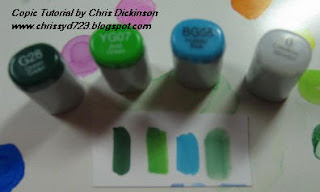
Drawing on top or next to the BG05, use YG07 (or other colors of your choosing) then take the darker pigment, in this case, I used G28… using less of the darker pigment than the lighter colors (remember there is more color pigment and gray in this for a darker color, so you need less) and blend with your Colorless Blender or any of the Copic Markers you are using. I used the Colorless blender so I can then tell when the color I mixed run out.

In the final image with the varying colors, you can see the mixed color drawn on the cardstock with the Colorless Blender. I put the covers for your viewing to see the colors I chose to mix.


I apologize for some of the blurry images on this next segment…

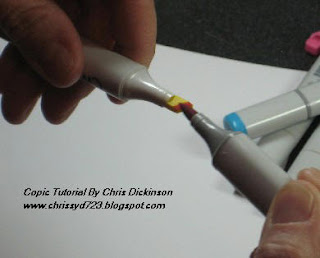
On last weeks Tutorial, I mentioned Tip to Tip coloring…

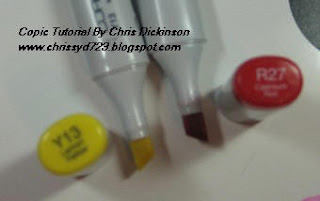
For this technique, you will need two Copic markers -


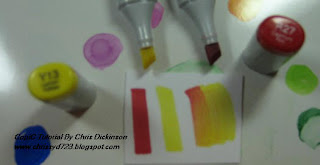
For easier visuals, so you can see the difference in the tips, I chose Y13 and R27. Color directly on the tips – you can use the brush tip or Chisel tip depending on what you want. I used the Chisel tip so you can see where the color is.


With Tip to Tip Coloring and any blending method, you will need to replenish your Coloring marker with the other color often. In the photograph, you can see the yellow markers return to their original color once the red color is used up off of the yellow tip.

Now that you have the basics, here is a stamped image being colored using the same techniques mentioned above in blending colors.


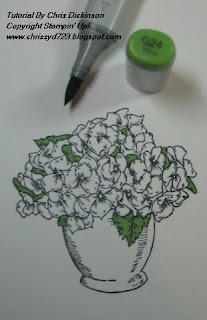
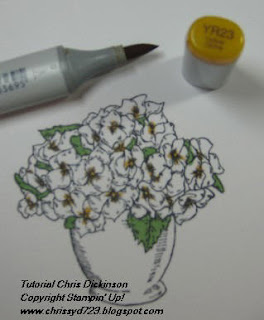
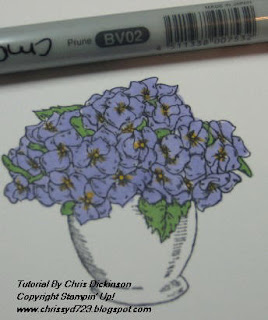
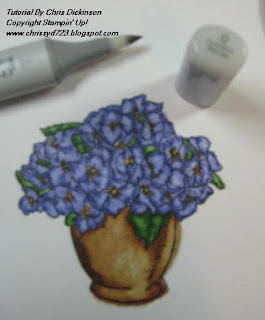
This week, I am using an image from Stampin’ Up! Called Bloomin’ Beautiful. I colored the green areas first with G24 because there are so many flowers in this image, I thought it would be best to color that first so I wouldn’t lose them when I color the flowers. I also colored the center of the flowers with YR23.


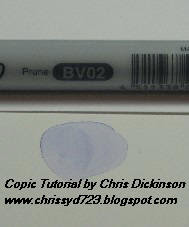
Using BV02 (my lightest color for this image) I colored a base coat on the flowers.


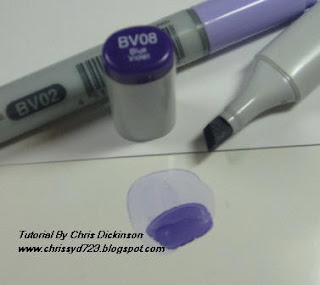
On my color Pallette, I colored BV02 to mix a darker color for shading. Then I used BV08 which is a touch darker than I need for my shading and blended them together with my Colorless Blender.
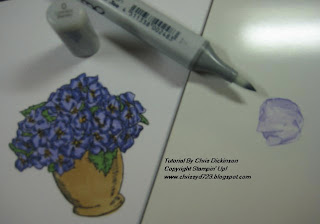
To shade the leaves, I mixed YG67 and YG99. I then went over the flowers with my lightest color BV02 and the leaves with my G24 to blend the colors.
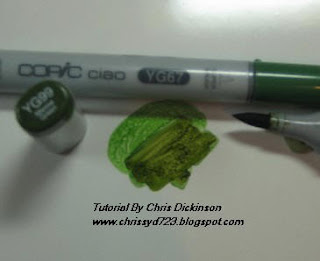
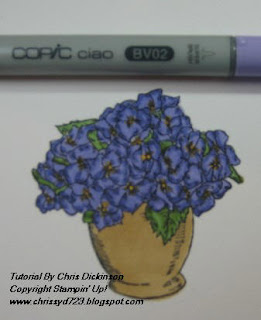
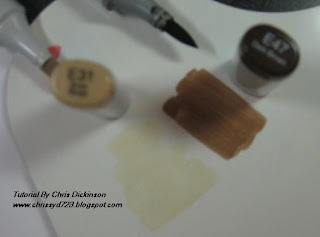
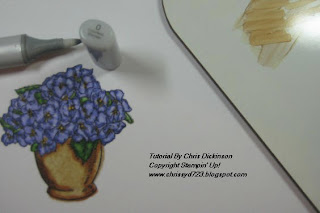
Using my Colorless Blender, I removed some of the color to add a bit more depth of light and shadows to the flowers and leaves.


In the stamped image, you can see where the artist of the stamp put shading lines… Add the darker color to those lines and even to areas you think it may naturally be darker. Next week, I will tell you more about LIGHT SOURCE and shading…


Once again I used the Colorless Blender to remove some of the color, adding a bit more contrast in the shading.

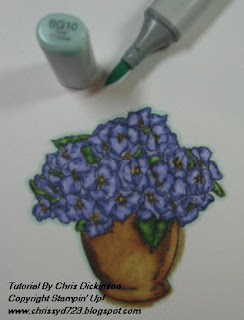
***TIP*** Do you see on my image how the color bleeds a bit over the stamped image line (the right side of the basin of the flowers)? That is due to over saturating the paper with the Colorless Blender. To avoid this, wait a few minutes longer between shading and removing color for the paper and ink to dry. Another way to avoid over saturation is to allow 1/8 of an inch from the image line so when your cardstock gets saturated, the ink will have a bit of room to spread.


Many people enjoy putting a halo around their image to make it POP out at you. I know varying people using different colors. I used BG10 on this image.

These tutorials take a few hours to do, so I like to know if they are helpful or not! Please let me know if you DO or do not find it helpful!
I will have a completed project for you with this stamp later this weekend!
THANK YOU!
Chrissy D

Monday, March 30, 2009

CHILD OF GOD - MONDAY DT CHALLENGE #18

I am home now -it seems as if I have been gone for a long time and have a lot of things to catch up on. I could choose to be stressed but today I am focusing on ONE MOMENT at a time and doing the important things FIRST! :) I hope you had a wonderful weekend, the past 5 days were very peaceful and full of laughter.
This weeks Monday Design Team Challenge is a sketch challenge. I used the Sweet 'n Sassy stamp set Child Of God. This was my very first stamp set that I designed! Have you participated in the challenges yet? If not, we are looking for more participants! Please head on over to http://www.sweetnsassystamps.blogspot.com/ and check out the challenge and play along!
For a bit more Inspiration check out the other Senior Design Team's projects:
Do not forget about the Monday Mail Call Challenge! I will be sending out 3 cards this week! Have a blessed day!


Chrissy D

Thursday, March 26, 2009

BLOGGERS CHALLENGE #92 & BELLI CHALLENGE

Good Day! I finally have it up! This week's Belli Challenge was to create a BOOK MARK using something you have not used in a LONG time. I purchased these Rub Ons well over a year ago because they were SOOOOO pretty and I HAD to HAVE them. So I grabbed those - it helped being gone on my Scrapbook Retreat to have my extra stash out before me. If you have not gone to the Belli Challenge Blog be sure to head on over there! http://www.bellichallenge.blogspot.com/
This week's Bloggers Challenge is to use the Texture Plates or Die Cuts. I used the Nestibilities as my "die cuts" and for the sketch I used the Sketch Challenge at Splitcoast Stampers #221. I used my stamp set - His Eye Is On The Sparrow and colored it with my Copics.


Since my mom is sitting next to me this weekend, I made her participate in the Sketch Challenge and the Bloggers Challenge too! :) Here is her SUPER CUTE card!
Be sure to check out the other Blogger Challenge participants projects. You will enjoy looking at them and surely be inspired!

Each morning, while here I have been reading a devotional to my table. I thought I would share what we read today... This was taken from the Proverbs 31 Ministries -I have these devotionals mailed to my mailbox each day.

Under My Skin
27 Mar 2009 Lynn Cowell"
…and provide for those who grieve in Zion- to bestow on them a crown of beauty instead of ashes, the oil of gladness instead of mourning, and a garment of praise instead of a spirit of depair..." Isaiah 61:3a (NIV)

It wouldn't stop burning. Like a sunburn after hours at the beach, the heat on my hands stayed for hours. As a blessing to my family, I had made Aunt Carol's jalapeno peppers. With the sharp knife and chopping block, I transformed eighteen forest-green peppers into little boats of tasty fun. What I hadn't counted on was that ten minutes of exposure to the pepper's oil to my dry, cracked winter skin produced a burning that lasted for hours.

As I looked at my red, cracked hands, I was reminded of another part of me that looked dry and under-nourished not so long ago. In the heat of the summer months, my heart was in bad shape. It felt like a stone. When I would go to church, I sang the songs, but my heart was not truly singing praise to my Love, Jesus. I assumed it was the church. Surely, something had changed. We needed new music; something fresh.

Soon after something did change, and it was me. I re-discovered the oil of gladness and oil of joy by personally coming into the Lord's presence daily. Although I had never stopped reading my Bible and praying, I hadn't been taking the extra time and effort to come into His presence.

With the help of a prayer journal, I started beginning my time with the Lord each day by exposing myself to Him in praise. In her journal, Intimacy with God; Your Daily Guide to Prayer, Tara Furman suggests several ways to come before Him: repeating His attributes, calling out His names, and singing hymns or worship songs. My favorite is read ing out loud the Psalms. Just yesterday the repairman heard Psalm 103 coming loudly from my lips as he banged away on my wood floor.

Opening the day with praises to my King has transformed my heart. Now, when I go to church, I no longer wait to enter into His presence; my heart is already there. I have found that my outlook through the day is different. Like the oil from the peppers, the burning effect of His presence is felt in my heart many hours after the exposure.

Dear Lord, as it says in Psalm 100:4, help me to enter into Your gates with thanksgiving and into Your courts with praise. Help me to give thanks to You and praise Your name. You are good and You deserve my heartfelt worship each day. I love you! In Jesus' Name, Amen.

Hope you have a great day! I am still in Iowa until Sunday but will have more posts.
Chrissy D

GORJUSS With Tutorial on Shading with Copics

I have promised MORE coloring Tutorials and it is finally here!
Copic recommends Neenah Cardstock - so we used that to start here and I stamped the image in Tuxedo Black Memento Pad. I started by coloring the entire area with E000
I then used E11 to add shadows where I thought it may be a bit darker naturally. I added a bit more shadowing with E00


Then...added R20 to add a tiny bit of rosi-ness to her cheeks.

And then went back over to blend with E000. In order to get a good blending, use the lightest color, then shadow, and back over with your lightest color.


I went over all of her hair with E33...and started to shadow it but remembered I needed to take a picture! :)

I wanted to go a bit darker and have a limited supply of Copics at this time, so I used the E44 to add shading. Once again where I felt it would naturally be a bit darker.

I took the E33 Copic Marker and went back over to blend the colors. Then took R 81 to color her cloak and hat.

I added some shadows with R85.

Did you know? The Colorless Blender is NOT a Blender at all? It is more of a highlighter or helps remove a bit of color to give it the special effect of looking lighter. One tip on shading, I always look at which direction I would imagine the light coming from and add the shadows in those areas.

I used R85 to add more shading, the R81 to go back over and blend the colors and the Colorless Blender to add a touch of lighter areas to her cap, leggings and coat.


I grabbed my BV02 and colored the hem of her garment and neckline of her blouse.


Once again, due to limited colors, I used BV13 - if I had it, I would have used BV04 or BV06 to add some shading.


Did you know that with the Copic Markers you can blend your own colors? Next week's tutorial will be ALL about that! This week I used the markers tip to tip to get the exact shade I wanted for my little fox... I used E08 and R02 due to my limited supplies to get the fox this color. When I was done shading it, I went over it completely with R02. The markers were NOT stained using them tip to tip and went back to the original color once I colored all of the blended colors out.
Some people like to add a "Halo" affect around their colored peices, so I used BG10 to mine.

Here is my completed project with the details...
Stamp Sets: Gorjuss Girls, A True Friend by Sweet 'n Sassy Stamps
Cardstock: Almost Amethyst, Basic Black, Bittersweet Basic Grey DP,
Accessories: Twill, Dew Drops, Mini Glue Dots, Primas, Paper Piercing Tool
Thank you for stopping by! I am away from my home on a Scrapbooking Retreat with my mom. It will be a wonderful time away from my normal routine with LOTS of quiet time with the LORD too. I am really needing that!
Please let me know if this tutorial is helpful! Have a blessed day!

Chrissy D